


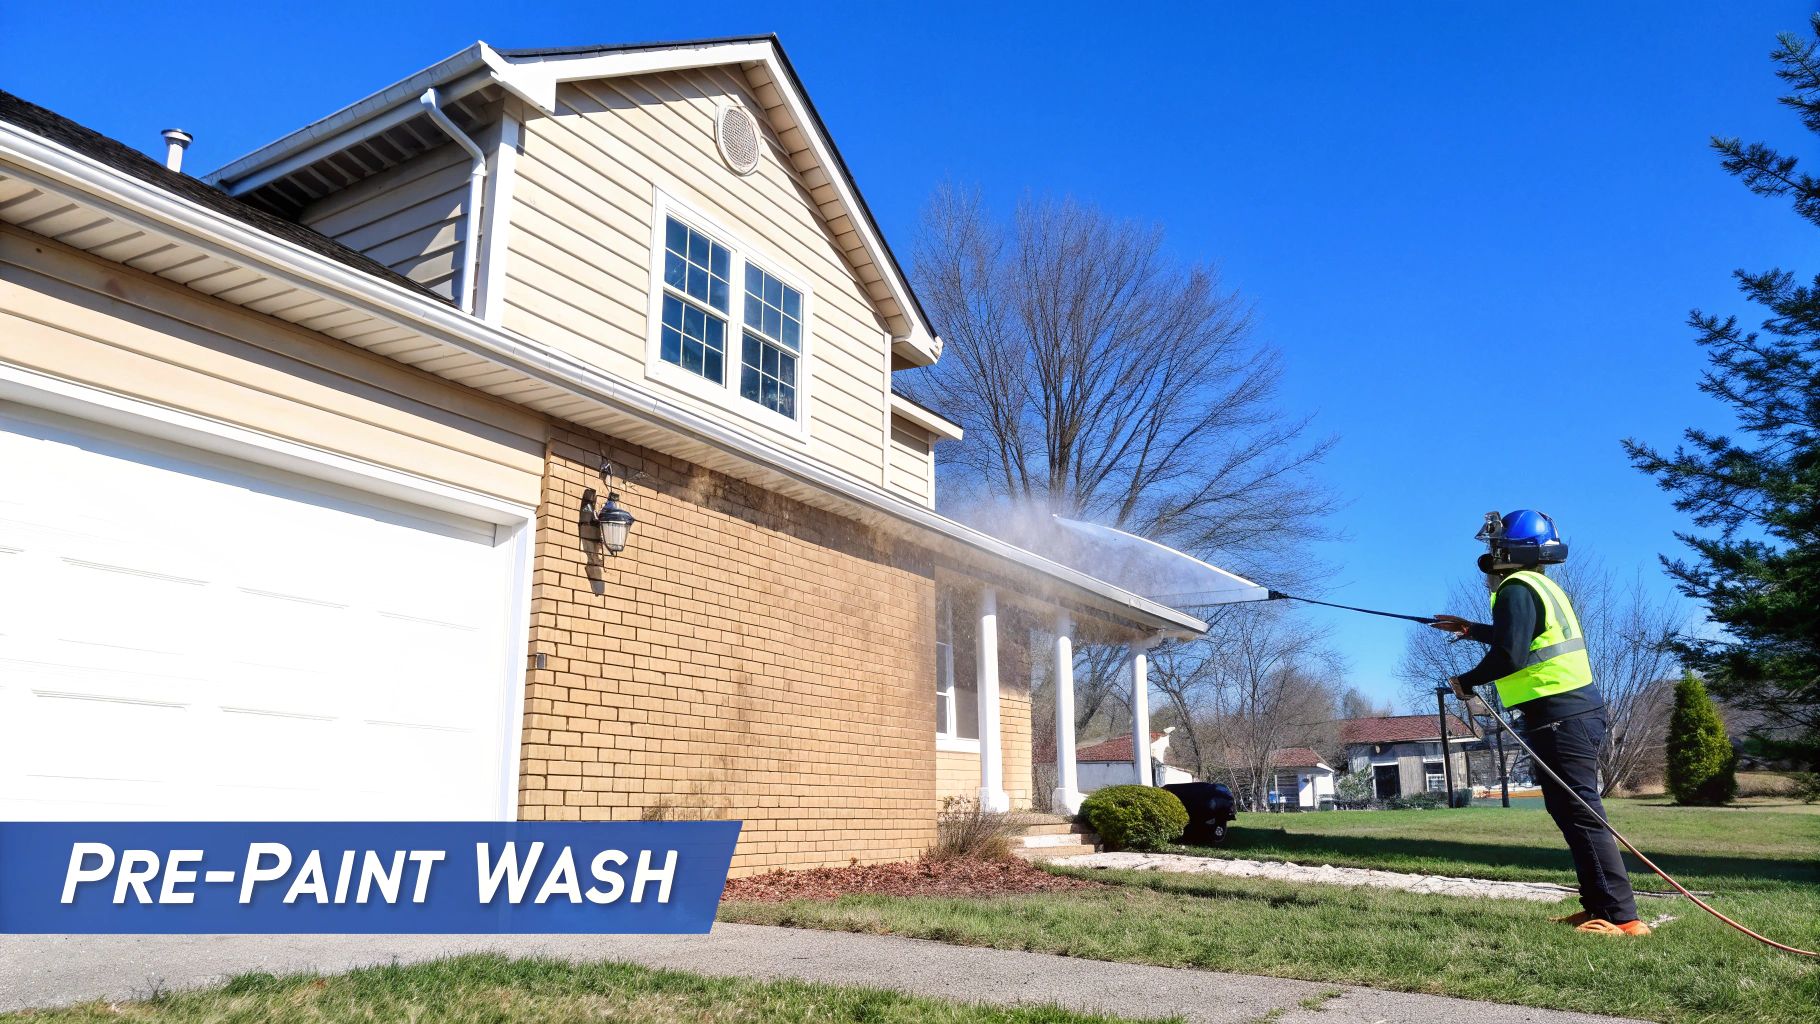
Yes, pressure washing your house before painting is a non-negotiable first step if you want a finish that actually lasts. Think of it as the foundational prep work that gets rid of all the invisible layers of dirt, dust, and grime that cause new paint to fail and peel prematurely.
If you skip this, your expensive new paint won't bond to the siding itself—it'll bond to the contaminants. And that will drastically shorten its life.
Why a Pre-Paint Wash Is Your Most Important Step
Painting your house is a lot like preparing a canvas for a masterpiece. You wouldn't just start painting over a dirty, dusty surface and expect a flawless result, right? The exact same principle applies to your home's exterior. Over the years, your walls collect an invisible film of pollutants, pollen, chalky old paint residue, and plain old dirt.
Painting directly over this layer is probably the single biggest mistake a homeowner can make. The new coat of paint sticks to that unstable layer of grime, not the solid structure of your home. When that grime inevitably shifts, flakes, or washes away, it takes your brand-new paint job with it. You'll see bubbling, cracking, and peeling far sooner than you'd ever expect.
The Foundation for a Lasting Paint Job
A proper pressure wash before painting creates the perfect surface for maximum paint adhesion. It’s not just about spraying water at the walls; it’s about systematically stripping away every single contaminant that stands between your new paint and the siding.
This step is especially critical in the unique climates we serve out here. For example:
- In Phoenix and Scottsdale, Arizona, that fine desert dust and monsoon grime can bake onto stucco and siding, forming a stubborn film.
- In Denver and Boulder, Colorado, heavy spring pollen seasons and winter road salt residue can leave a thick coating on exterior walls.
- In Las Vegas and Laughlin, Nevada, the combination of dry, arid conditions and urban pollutants creates a unique challenge that paint just won't stick to without a deep clean.
Without a thorough wash, any paint applied in these environments is pretty much destined for a short lifespan. A clean, properly prepared surface is the only way to make sure your investment is protected.
To see just how big of a difference this one step makes, take a look at the table below. It breaks down what you can expect in terms of longevity and long-term costs.
Paint Job Longevity and Cost With and Without Pressure Washing
| Metric | With Pressure Washing Prep | Without Pressure Washing Prep |
|---|---|---|
| Paint Job Lifespan | 7-10 years on average | 2-4 years at best |
| Paint Adhesion | Excellent; bonds directly to the surface | Poor; bonds to dirt, grime, and old paint |
| Appearance | Smooth, professional, even finish | Prone to bubbles, cracks, and peeling |
| Long-Term Cost | Lower; repaint every decade or so | Higher; requires repainting 3-4 times as often |
As you can see, the choice is pretty clear. Putting in the prep work upfront saves you a ton of money and headaches down the road by drastically extending the life of your paint.
Doubling the Lifespan of Your Exterior Paint
The impact of this one prep step is huge. Industry experts consistently find that a good pressure wash before painting can double the lifespan of an exterior paint job, taking it from a mere 3-4 years to a solid 7-10 years. When you paint over a dirty surface, the paint just can't get a good grip, leading to imperfections and peeling as early as the first year.
Here in the Southwest—in the markets across Arizona, Colorado, and Nevada that Professional Window Cleaning has served since 1999—this is even more true. A clean, smooth surface is essential for durability on the stucco and wood siding so common in homes across Phoenix, Denver, and Las Vegas. You can find more great insights about paint prep over on finehomebuilding.com.
Key Takeaway: The time and effort you spend on pressure washing directly translates into years added to your paint job's life. It will save you significant money and frustration on future repainting projects.
Protecting Your Home’s Most Vulnerable Areas
While cleaning the siding is the main event, the process also reminds us that other parts of your home need special care—especially the windows. You should never aim a high-pressure water stream directly at windows. It’s an easy way to break the glass, damage the seals (which leads to foggy panes), and even force water inside your home.
After a thorough pressure wash, your windows will inevitably be covered in overspray and dislodged dirt. This is where a professional touch makes all the difference. Our teams use specialized tools like squeegees, ladders, and pure water systems to deliver a streak-free shine without risking any damage. It’s the perfect finishing touch to your prep work, ensuring every single part of your exterior looks its absolute best. You can learn more about the many benefits of professional residential window cleaning services in our detailed guide.
Assembling Your Toolkit and Prepping Your Property
A truly great paint job hinges on what happens long before you even pick up a brush. The prep work, specifically the pressure washing, is the line that separates a professional-grade finish from a costly weekend disaster. Think of this as your pre-flight checklist to make sure you have the right gear and your property is completely safeguarded before the water starts flying.
First things first, let's talk about the pressure washer itself. For most residential siding, you don't need a beast of a machine. An electric or gas-powered model with a PSI (pounds per square inch) rating between 1,500 and 2,500 is usually the sweet spot. Anything stronger can easily chew through vinyl or wood, and anything weaker just won't have the oomph to blast away years of grime.
Choosing the Right Nozzle for the Job
Honestly, the real secret to a damage-free wash isn't the machine—it's the little colored tip you snap onto the end of the wand. Using the wrong nozzle is the number one mistake I see homeowners make, and it can be a destructive one. Each tip is color-coded for a reason; it tells you the angle of the spray, which dictates the force of the water stream.
- 40-Degree White Tip: This should be your go-to for most siding, especially more delicate surfaces like vinyl and wood. Its wide fan spray cleans a large area without concentrating too much force in one spot, which helps prevent ugly gouges or splintering.
- 25-Degree Green Tip: Save this one for tougher, more durable materials like brick and stucco. The narrower angle gives you a bit more power to knock off stubborn dirt and the chalky, failed paint you often find on homes in sunny areas like Tempe and Chandler, AZ.
- Soap Nozzle (Black Tip): This low-pressure tip is only for applying detergents. It has zero cleaning power on its own but allows you to spray your cleaning solution evenly across the surface.
An extension wand is another piece of gear I wouldn't work without, especially for two-story homes in neighborhoods across Westminster or Arvada, CO. It lets you safely reach high peaks and second-story eaves without teetering on a tall, unstable ladder.
Safeguarding Your Home and Property
Once your equipment is staged, it's time to batten down the hatches. Protecting your property from high-pressure water and cleaning solutions is non-negotiable. This simple prep work prevents a world of headaches, from fried electrical outlets to ruined flower beds.
Start with your landscaping. Grab some plastic sheeting or tarps and cover any delicate flowerbeds, shrubs, and gardens nearby. You're shielding them not just from the force of the water, but also from any cleaning agents. A little painter's tape or a few small rocks will keep the covers from blowing away.
Next up: electricity. Walk the perimeter and locate every outdoor outlet, light fixture, and junction box. You need to seal these up tight with waterproof tape and plastic to keep water out. A short circuit is the last thing you want to deal with.
Finally, clear the deck. Move all your patio furniture, the grill, planters, and any decorations well out of the overspray zone. This not only keeps them safe but gives you a clear, unobstructed path to work your way around the house.
A Pro Tip on Neighborly Courtesy: Before you fire up that noisy engine, do a quick walk over to your immediate neighbors. A simple heads-up about the noise and the chance of a little overspray drifting their way is a courtesy that goes a long way in keeping the peace.
As you're gathering your supplies, it's a good time to appreciate the full range of gear we pros use. For us, it's not just about pressure washers; it's a whole arsenal, from squeegees for ground-level work to boom lifts and rope descent systems for skyscrapers in Glendale or Paradise Valley. You can get a peek into our world by checking out our guide to professional window cleaning tools. And since washing is just one part of the equation, you can find more great advice on how to prepare walls for painting like a pro. Getting this prep work right is what sets you up for a smooth, successful project.
Getting Your Pressure Washing Technique Just Right
With your property prepped and your gear laid out, it's time for the main event. Getting the pressure washing technique right is what separates a clean, paint-ready surface from a costly repair job. This isn’t about brute force; it's about finessing away years of dirt and grime with precision.
The golden rule is simple: start at the top and work your way down. This keeps dirty runoff from streaking over areas you’ve just cleaned. I find it’s best to work in manageable sections, maybe four or five feet wide at a time. Use a steady, sweeping motion, and make sure you overlap each pass by about 30%. This simple trick prevents those annoying "tiger stripes" of leftover dirt.
One PSI Does Not Fit All: Adjusting for Different Surfaces
Blasting away at your house with one pressure setting is a surefire way to cause damage. Different materials need a different touch, and getting this wrong can mean splintered wood, chipped brick, or siding with permanent "etching" marks.
Here’s a quick rundown based on what we typically see in our service areas:
- Wood Siding (500–800 PSI): Common on historic homes in Flagstaff or mountain cabins near Golden, Colorado, wood is incredibly soft. Too much pressure will tear up the grain and force water deep into the fibers, which is a recipe for rot. Stick with a wide, 40-degree nozzle and keep your distance.
- Vinyl Siding (1000–1300 PSI): While vinyl is pretty tough, high pressure can still crack it or, worse, shoot water up behind the panels. Always maintain a downward angle to prevent water from getting into the seams where it can get trapped and cause mold issues.
- Brick and Stucco (1200–1500 PSI): These surfaces, seen everywhere in Phoenix and Las Vegas, can take a bit more of a beating. A higher PSI is perfect for blasting away the chalky, oxidized paint and baked-on dust that’s so common in our dry climates. A 25-degree nozzle usually works best here.
As a rule of thumb, always start at least two to three feet back from the wall. You can inch closer if you need more cleaning power, but you can’t undo damage from being too aggressive.
To Soap or Not to Soap? Water vs. Detergent
Your next call is deciding between plain water and a cleaning solution. The answer really depends on what you're trying to clean off.
For a home in a dusty spot like Scottsdale or Laughlin, a good rinse with plain water is often all you need to remove the surface dirt and get it ready for paint. But if you’re up against organic growth or stubborn grime, you’ll need some backup. A mild, biodegradable detergent is great for cutting through everyday grease and dirt.
If you see green or black growth, especially on shaded north-facing walls, a mildewcide is a must. Don't even think about painting over mildew. It’s like putting a band-aid on an infection—that mildew will just eat its way right through your brand-new paint job.
Before you pull the trigger, make sure you've covered the basics of property prep.
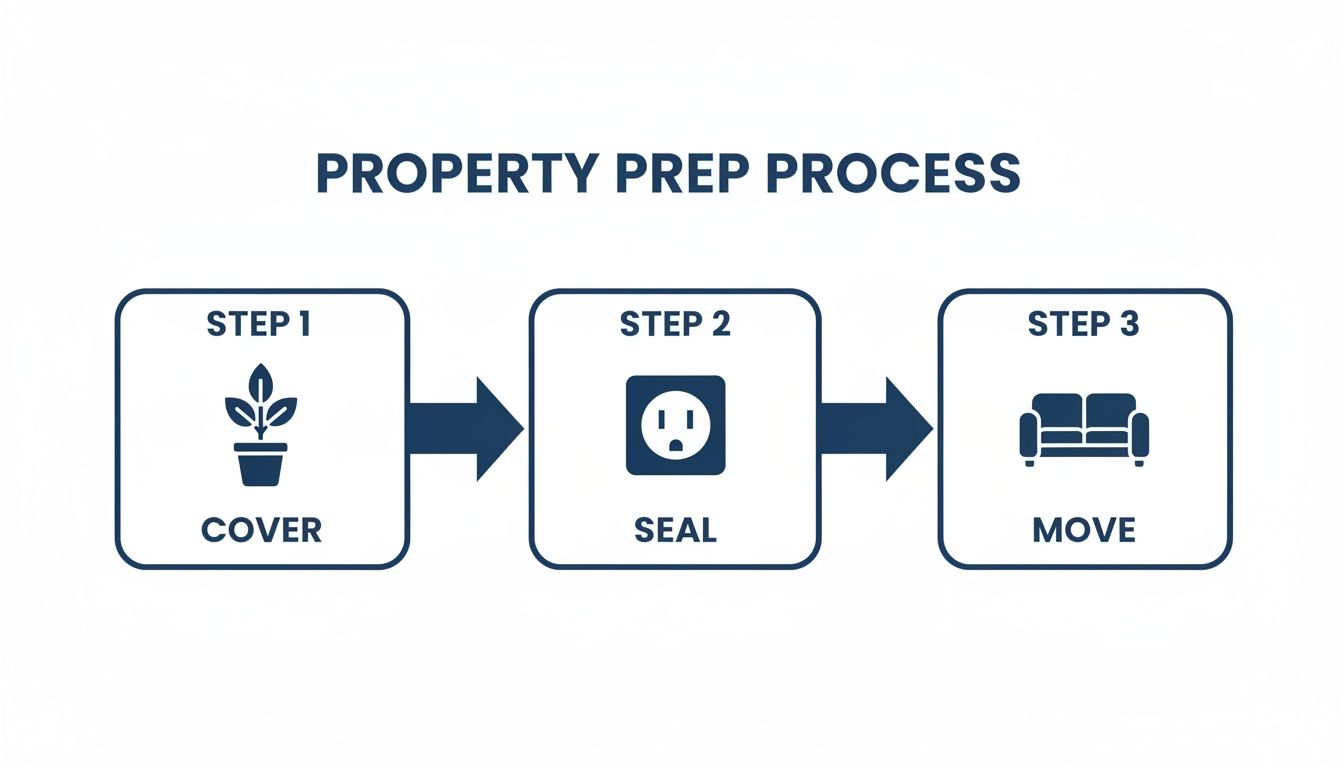
This quick visual guide hits the nail on the head: covering plants, sealing electrical outlets, and moving furniture aren't just suggestions, they're essential for a safe, clean project.
The Real Cost of Cutting This Corner
Trying to save time by skipping the pressure wash is one of the most expensive shortcuts you can take. Pro painters will tell you that paint jobs on unprepped surfaces see failure rates of 40-60% in just a couple of years, all because dirt and moisture get trapped under the new coat.
In dusty places like Arizona and Nevada, where monsoon storms cake grime onto walls, skipping this step can literally cut a paint job’s lifespan in half. You’ll go from a solid 7-10 years down to a disappointing 3-4. And it’s not just skipping the wash—using the wrong technique can be just as bad, forcing water behind siding and creating a whole new set of peeling problems.
Expert Insight: Never aim a high-pressure stream directly at windows, seams, or vents. You're trying to clean the surface, not inject water into your wall cavities. This is especially true for windows—a direct blast can break seals or even shatter the glass.
Once the siding is done, your windows are going to need some special attention. A pressure washer will leave them spotty. The only way to get them truly streak-free is with professional tools like squeegees and pure water systems. The techniques for siding and glass are worlds apart. To get a better idea of the difference, check out our breakdown of water-fed poles vs. traditional window cleaning methods.
The Critical Drying and Inspection Phase
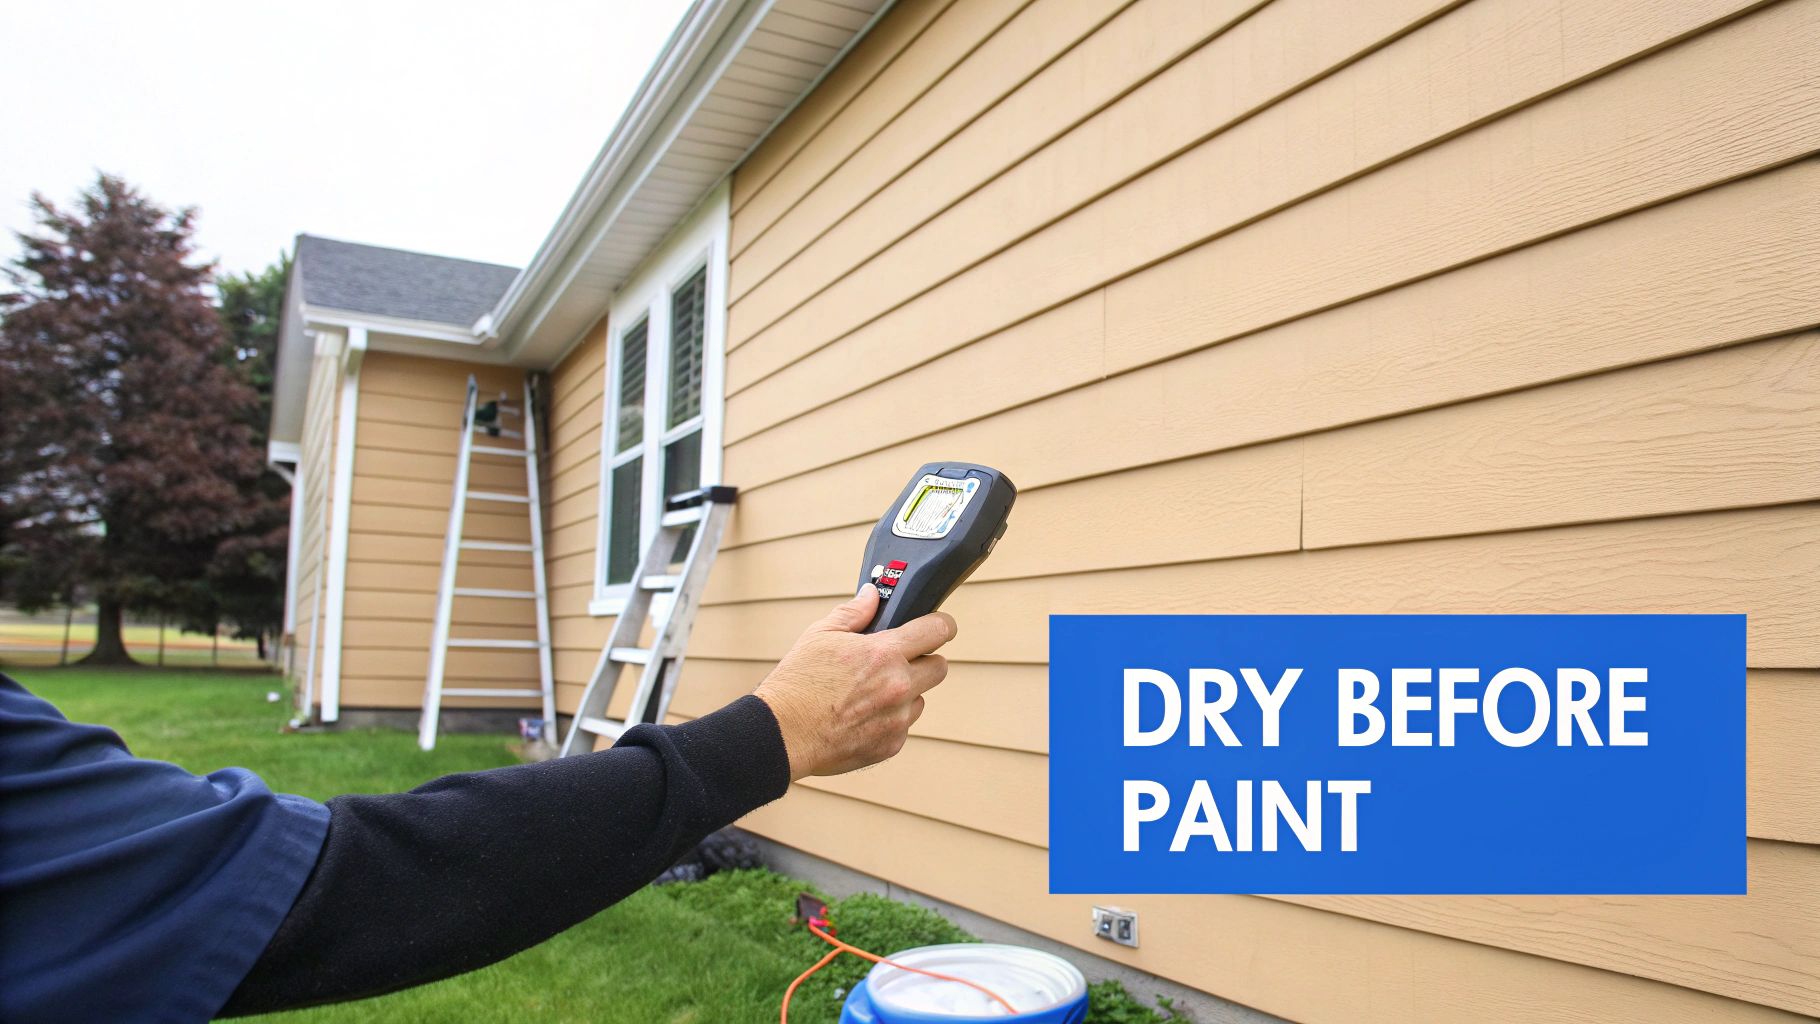
You've blasted away years of grime, and the house looks fantastic. Now comes the most important tool in your arsenal: patience. Rushing to paint over a damp surface is a rookie mistake, and it's a costly one. Trapping moisture under a fresh coat of paint is a surefire recipe for bubbles, blisters, and peeling within the year.
This waiting game is every bit as crucial as the wash itself. You have to let the siding, stucco, or brick fully breathe and release all that absorbed water. This step ensures your primer bonds directly to a solid, stable surface—not one secretly compromised by moisture.
Understanding Climate and Drying Times
How long you need to wait is almost entirely dictated by your local climate. There’s no magic number here, and getting it wrong can completely undo all your hard work. A house in a dry, arid climate will be ready to go far sooner than one in a cool, humid region.
Here in Arizona, where our teams work in places like Phoenix and Prescott, we have a massive advantage. Thanks to the consistently low humidity, surfaces dry out remarkably fast—often in just a matter of hours.
But even here, we don't guess. Our pros always use a moisture meter to confirm that wood and stucco are at 18% moisture or less before a single drop of paint is applied. It's a non-negotiable step to prevent adhesion failure. This quick turnaround is a world away from humid areas where drying can take several days.
Key Takeaway: Never, ever trust a visual check alone. Siding can feel bone-dry to the touch but still be holding plenty of water just beneath the surface. Using a moisture meter is the only way to be 100% certain your home is ready for paint.
The Professional Final Inspection
Once you've confirmed everything is dry, it’s time for a final, detailed walkthrough. This isn't just a quick glance around the property; it's a meticulous inspection to catch any issues the pressure washing might have uncovered. With all the dirt gone, you can finally see the true condition of your home's exterior.
Your inspection should zero in on three key areas:
- Remaining Contaminants: Hunt for any stubborn grime, mildew spots, or chalking that the washer might have missed. Pay close attention to tricky spots like under the eaves or behind downspouts.
- Loose or Flaking Paint: The force of the water often exposes areas of failing paint that weren't obvious before. Every one of these patches needs to be scraped and sanded smooth before you even think about priming.
- Necessary Repairs: Now’s the time to look for cracks in the stucco, failing caulk around windows and doors, or any soft spots in wood siding. These issues must be repaired now to prevent water from getting in later.
Don't Forget the Windows
After a heavy-duty pressure wash, your siding might be spotless, but your windows will be a mess of overspray, hard water spots, and dislodged dirt. This is where a professional touch makes all the difference. Attempting to clean them yourself will just create a streaky disaster that detracts from your fresh paint job.
Our crews in areas like Denver, CO, and Las Vegas, NV, come in with specialized equipment to restore perfect clarity to your glass. We use professional-grade squeegees and pure water systems to remove every trace of residue safely, without damaging the glass or seals. It's the final, critical step to ensure your entire home looks pristine and professionally finished.
Knowing When to Hire a Professional
Going the DIY route on pressure washing before a paint job can be a rewarding weekend project, but let's be honest—it's not always the right move. You really have to take a hard look at the complexity of the job, the gear you'll need, and your own comfort level. Sometimes, bringing in a professional isn't just about convenience; it's the smartest and safest investment you can make for your home.
Certain situations pretty much demand an expert touch. If you're looking at a multi-story home, dealing with delicate or historic siding, or battling significant mildew and algae, a pro brings the right tools and, more importantly, the right experience. They know the nuances that can trip up a homeowner, ensuring your prep work is perfect without causing thousands in damage.
Assessing the Job’s Demands
The decision really boils down to the scope and difficulty of the project. A single-story ranch with standard vinyl siding in a place like Erie, CO, is one thing. A three-story historic home in Flagstaff, AZ, with its original wood siding? That's a completely different ballgame.
Think through these factors before you rent that pressure washer:
- Height and Accessibility: Can you actually, and safely, reach the highest points of your home? Professionals show up with the right gear—ladders, boom lifts, and even scaffolding—to safely tackle multi-story homes in areas like Tempe or Chandler.
- Surface Material: Are you cleaning durable brick or trying not to destroy older, delicate wood? A pro knows the exact PSI needed to clean effectively without gouging wood, chipping stucco, or forcing water behind your vinyl siding.
- Contaminant Levels: Is it just a season's worth of dust, or are you up against years of baked-on grime and stubborn mildew? Professionals have access to commercial-grade cleaners that are far more effective than what you'll find on the shelf at your local hardware store.
The Professional Advantage: Equipment and Expertise
The real value an experienced crew brings isn't just a more powerful machine. It's the combination of that commercial-grade equipment with a deep understanding of how to use it safely. This is where a team like ours makes a difference. With more than two decades under our belts, we handle the complex jobs that are just too risky for the average homeowner.
Our specialized equipment includes boom lifts for reaching towering walls and even rope descent systems for properties with tricky access points. For homeowners in communities like Boulder or Paradise Valley, where architecture can create hard-to-reach surfaces, this is a game-changer. It means the job gets done right the first time, protecting your property and delivering a perfectly prepped canvas for painting. You can see how costs for these specialized services break down in our guide on roof pressure washing prices.
DIY vs Professional Pressure Washing Decision Guide
Not sure which path to take? Use this checklist to see if a DIY approach fits your project or if hiring an expert is the better investment for your time and property.
| Consideration | Good for DIY | Better to Hire a Pro |
|---|---|---|
| Building Height | Single-story home, everything easily reachable from the ground. | Multi-story homes, complex rooflines, or hard-to-reach areas. |
| Siding Material | Sturdy, modern materials like vinyl or brick in good condition. | Older wood, stucco, historic materials, or any siding that appears delicate/damaged. |
| Contaminant Level | Light dust, pollen, and minor dirt buildup. | Heavy mold, thick algae, stubborn stains, or years of baked-on grime. |
| Your Experience Level | You've used a pressure washer before and understand the risks. | Little to no experience; not comfortable working with high-pressure equipment. |
| Available Time | You have a full weekend to dedicate to prep, washing, and cleanup. | You have a tight timeline or limited availability. |
| Equipment on Hand | You own or can easily rent the right machine, nozzles, and safety gear. | The job requires specialized lifts, extension wands, or commercial-grade cleaners. |
Ultimately, this table helps you weigh the real-world factors. A quick, simple job might be perfect for a Saturday afternoon project. Anything more complex often justifies calling in someone who does this every single day.
Don't Forget the Finishing Touches
So, the siding is sparkling clean. What about your windows? Pressure washing inevitably blasts them with a film of overspray and grime. A professional service doesn't just stop at the walls.
We finish the job with professional tools like squeegees and pure water systems to give you a streak-free, crystal-clear view. It’s a critical final step that DIY projects almost always miss. Our teams in Denver, Phoenix, and Las Vegas are fully equipped to provide that pristine, polished look that truly makes a new paint job pop. For tasks outside your comfort zone or for cleaning other complex structures, knowing when to call for help is key. You might consider looking into professional pressure washing services for outdoor structures to get a sense of how pros approach specialized cleaning jobs.
A professional pressure washing service isn't just about cleaning; it's about risk management. You're investing in the peace of mind that comes from knowing the job will be done safely, correctly, and without damaging your home.
In the end, choosing to hire a professional for pressure washing your house before painting is about guaranteeing the foundation of your paint job is flawless. It protects your investment, saves you a ton of time, and delivers a level of clean that’s incredibly tough to achieve on your own, setting the stage for a beautiful, long-lasting finish.
Common Questions About Pre-Paint Pressure Washing
Even the best-laid plans run into real-world questions. When you're tackling a project as big as painting your house, a few of those are bound to pop up. Let's walk through some of the most common questions we get from homeowners about getting the pressure washing stage just right.
How Long Does a House Need to Dry After Pressure Washing?
This is a big one, and the answer depends almost entirely on where you live. For a home in a dry, sunny spot like Phoenix, Arizona, the siding might feel dry to the touch in just a few hours. But don't be fooled—moisture can still be trapped just under the surface, waiting to ruin your new paint job.
The safest rule of thumb, no matter your location, is to wait a bare minimum of 24 hours after washing before you even think about cracking open a can of paint.
If you’re in a cooler or more humid climate, or if the weather is just overcast and gloomy, you should budget at least 48-72 hours for drying time. The only way to be 100% sure is with a moisture meter. A true professional painter won't even start until that meter gives a reading below 18% moisture content.
Can Pressure Washing Damage My Siding or Windows?
Yes, it absolutely can. This is probably the single biggest risk when you DIY a pressure washing job. Wielding the wrong nozzle—especially a zero-degree red tip—or just standing too close can turn that water stream into a chisel. It will splinter wood, chip away at brick, and blast water behind siding where it can set the stage for mold and rot.
Windows are particularly fragile. You should never, ever aim a high-pressure stream directly at the glass. It can shatter the pane outright or, more sneakily, break the delicate seals on double-pane windows. This creates that permanent, ugly fogging effect that can only be fixed by replacing the entire window. A pro knows to use wide-angle nozzles and keep a safe distance.
Should I Use Chemicals or Just Water?
It really comes down to what you're trying to wash away. If you're just dealing with light surface dust and pollen, a common sight on homes in places like Commerce City or Glendale, then plain water will often do the trick.
But if you’re seeing green or black stains from mildew, algae, or just layers of stubborn grime, a cleaning solution is non-negotiable. Trying to paint over mildew is a recipe for disaster; the fungus will simply eat its way right through the new paint. Make sure you grab a detergent made specifically for pressure washers, follow the instructions to the letter, and rinse it off completely before it gets a chance to dry on the surface.
Is It Safe to Pressure Wash My Windows?
No. It is never safe to hit your windows with a high-pressure stream. After you’ve washed the siding, your windows are going to be a mess of dirt and overspray, but a pressure washer is absolutely the wrong tool for cleaning them up.
The only way to get them sparkling clean without causing damage is with a separate, professional cleaning. Our crews in Las Vegas, Denver, and across Arizona use specialized gear like squeegees, ladders, boom lifts, and even pure water systems to gently lift away all that residue. This professional touch guarantees a streak-free shine and protects your glass, frames, and seals, giving you the perfect finishing touch before the painters arrive.
For a flawless finish that starts with expert preparation, trust the experienced crews at Professional Window Cleaning. We handle the tough jobs safely, from high-pressure washing to delicate window cleaning, ensuring your home is perfectly prepped for its new look. Visit us online to get your fast, free quote today!